
To properly set up your github repositories, you will need to set the MIT code repositories as your upstreams. While the origin repository represents code that you write, the upstream repository is the original repostiory that your code “works off of.” At first, it may seem like you don’t need to use the upstream anymore, since you already have the code. However, this is an important step because if the upstream code changes, adding the upstream allows you to update your code to match the most recent state of the upstream.
Add the Upstream
Open a terminal and go to the directory of your image processing repository. Then, type the command
git remote -vto check that your origin is set properly. You should see the following output:origin https://github.com/<username>/student-image-processing (fetch) origin https://github.com/<username>/student-image-processing (push)
Add the upstream by writing the following line into your terminal:
git remote add upstream https://github.com/bwsi-hadr/student-image-processing.git
This now makes the bwsi-hadr repository (not your own) the upstream repository for your work.
Check that you’ve successfully added your upstream by trying the command
git remote -vagain. You should see the following output:origin https://github.com/<username>/student-image-processing (fetch) origin https://github.com/<username>/student-image-processing (push) upstream https://github.com/bwsi-hadr/student-image-processing.git (fetch) upstream https://github.com/bwsi-hadr/student-image-processing.git (push)
Repeat steps 1-3 for all three repositories: student-image-processing, student-access-images, and student-pi-imaging
Check that all three of your repositories are set with your repository as the origin and the bwsi-hadr repository as the upstream.
The command
clearin a Linux command line clears the terminal, similar to the clear button on a calculator. The command is completely optional and does not affect the repositories.
Please Note: Your origin should have your username, not intermezzio, as the owner of each repository.
Set up your Submodule
Submodules are an important feature for larger git projects. A submodule connects two repositories, which means that one repository is literally inside another. More information about submodules can be found here. In this project, you will make your student-access-images repository a submodule of your student-image-processing repository.
Open a terminal (or git bash terminal) on your computer and navigate to your
student-image-processingproject folder. You should have cloned this repository when you downloaded the code.BE EXTREMELY CAREFUL when you perform this next step. Make sure your forked
student-access-imagesrepository is set as the submodule, as opposed to the bwsi-hadr one. To add the submodule, run the following command in yourstudent-image-processingrepository:git submodule add https://github.com/<username>/student-access-images.git
Save your changes by typing the following code:
git add .
git commit -m "Add the 'student-access-images' submodule"
git push origin master
Once these commands are run, open your
student-image-processingrepository on github and check that the submodule is added: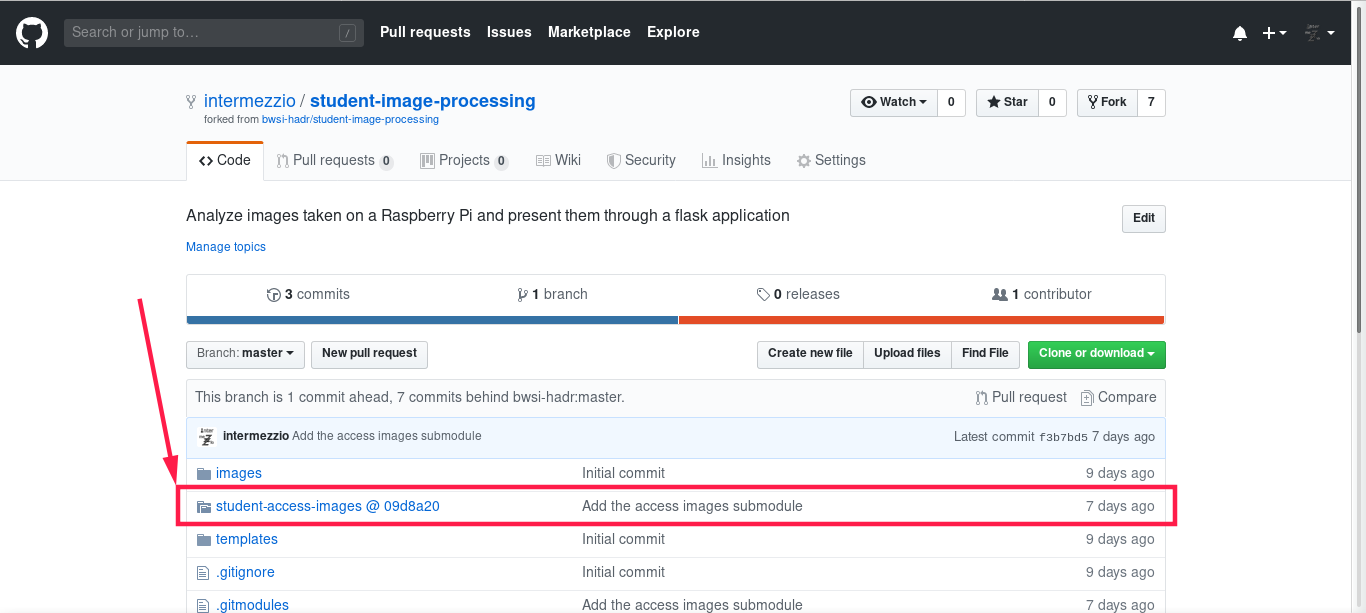
The interesting folder icon in the image above is the submodule. The
@ 09d8a20after the folder name is the last commit forstudent-access-imageson this repository.
Troubleshooting
Troubleshooting the Upstream Setup
Also, if any of the information in your git remote -v output is incorrect, use
git remote set-url [origin or upstream] the-correct-url.com/something.gitto fix your links

Troubleshooting the Submodule Setup
If you set the wrong repository as your submodule, follow the following steps to remove it.
Remove the actual folder. In the repository, running the following command will remove the folder:
rm -rf student-access-images
Remove the
.gitmodulesfile. This can be done by doing the following:rm .gitmodules
Then, open the file
configin the.gitfolder and remove the lines that specify the submodule. This file can be opened with the following command:nano .git/config
Now, you should be ready to add the submodule.